私はまだまだ初心者のVimmerですが、Vimがあまりにも快適で使っていて気持ちよいため、普段からキーバインドをVimに変更できないかを調べています。
タイトルの通り、普段使っているBashにもViモード があるということが分かり、早速変更したのでメモ。
設定したターミナル
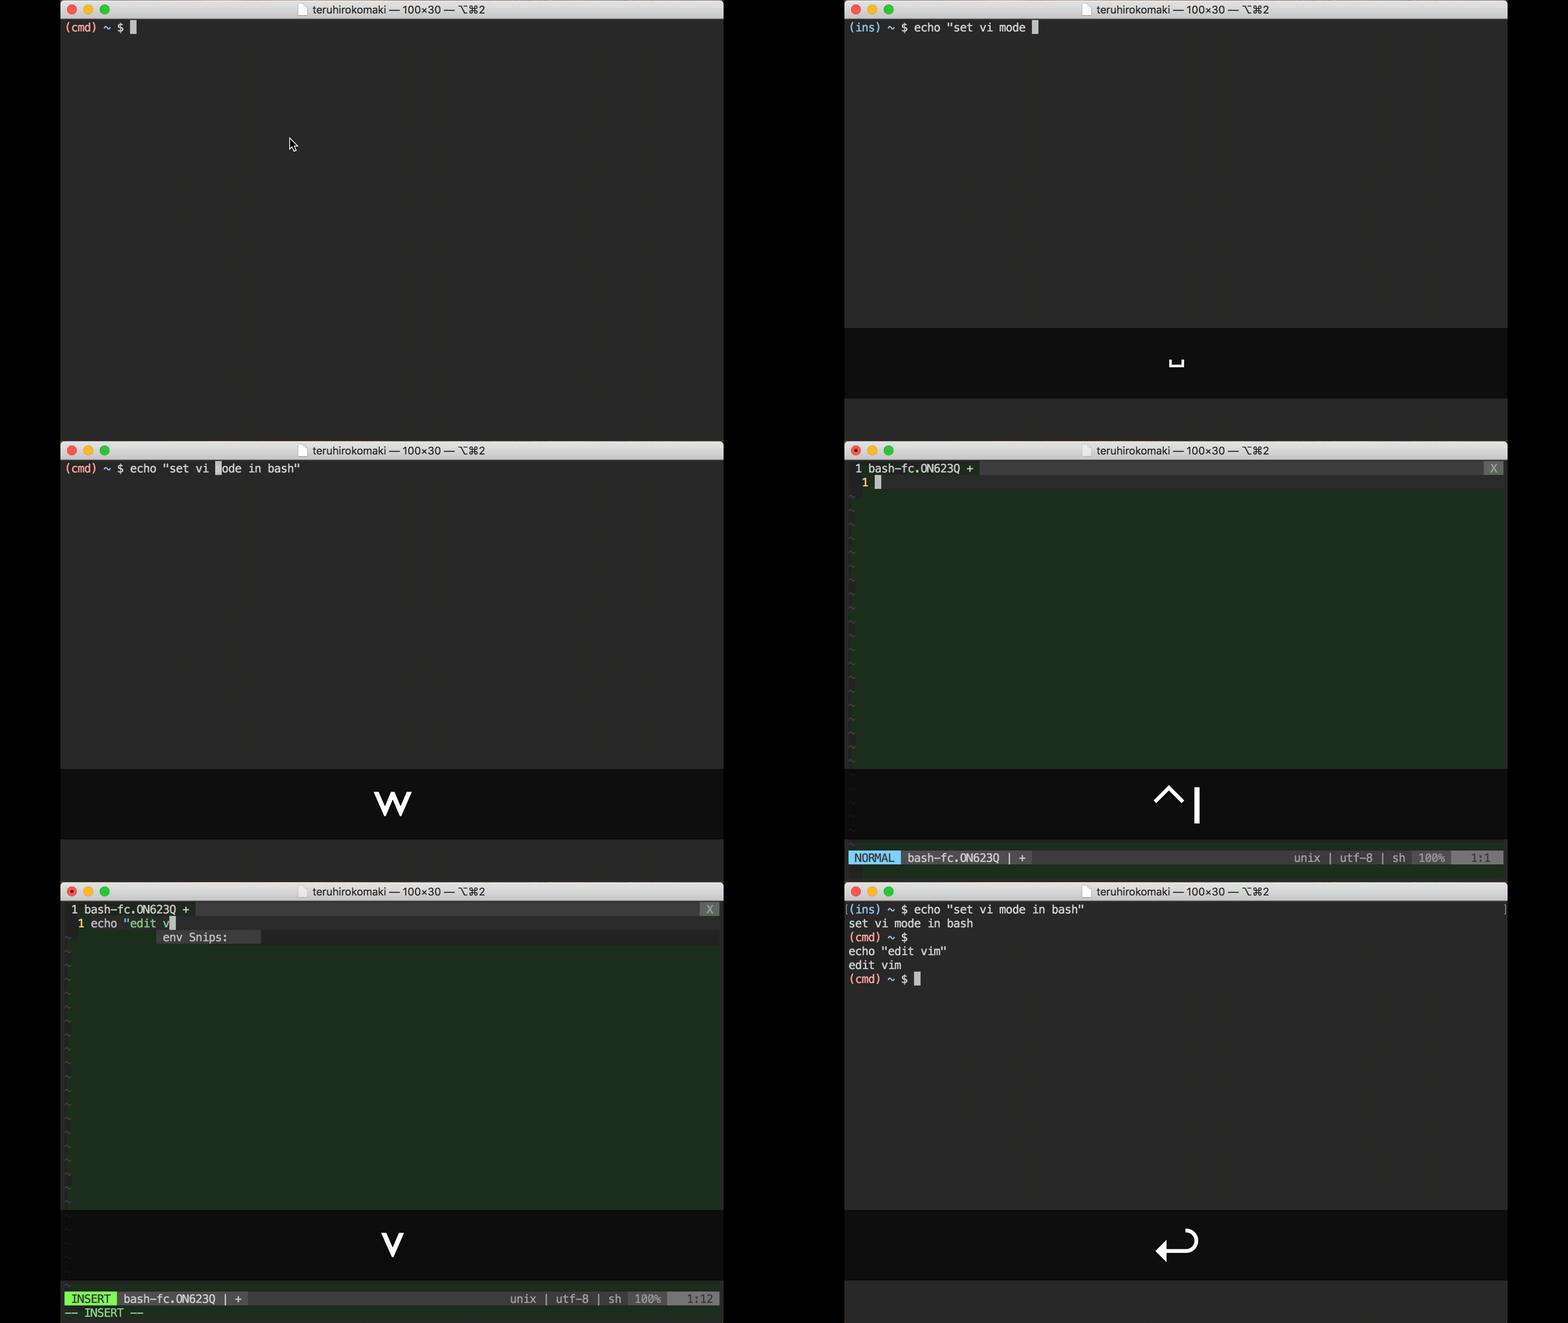
BashのViモードについてググる
まずは検索してみます。
- vim色に染まれ.機能紹介のついでにbashをvi仕様に.
- bashの編集モードをviモードにしてみる
- bashの操作をvi風にする
- 【Vim】えっ?Vimmerなのに、シェルのキーバインドはEmacsモード使ってるの?
上の記事では~/.bashrcにset -o viを追加すればOK、と書いてある。
# ~/.bashrc

set -o vi
しかし、私は最終的に、以下のブログを参考にし~/.bashrcではなく~/.inputrcを修正しました。
以下に、Use vi shortcuts in terminalに載っていた設定を引用します。
# ~/.inputrc

# Use Vi, not Emacs, style editing
set editing-mode vi

# Show all completions as soon as I press tab, even if there's more than one
set show-all-if-ambiguous on
# Ignore case
set completion-ignore-case on
# on menu-complete, first display the common prefix, then cycle through the
# options when hitting TAB
set menu-complete-display-prefix on

###########################################################
# Keymaps for when we're in command mode (e.g., after hitting ESC)
set keymap vi-command

# Insert the arguments from the last command
"p": "i !!*\r"

# When hitting option-up/option-down, cycle through the previous commands
# which start with the prefix you've entered, rather than just cycling through
# the last entered commands.
# In OS X's Terminal.app preferences, I have 'Use option as meta key' off, and
# have mapped "option cursor up" to "\033\033[A" and "option cursor down" to
# "\033\033[B".
# Feel free to bind to whatever you want. Delete the first '\e' in the keymap
# to set plain up/down to do a history search by default.
"\e\e[A": history-search-backward
"\e\e[B": history-search-forward

###########################################################
# Keymaps for when we're in insert (i.e., typing stuff in) mode
set keymap vi-insert

# Pressing tab will list all completions & select the first one. Pressing it
# again will cycle through available completions.
TAB: menu-complete
# Shift-TAB cycles completions backward
"\e[Z": menu-complete-backward

# Option-up/option-down should also apply to insert mode
"\e\e[A": history-search-backward
"\e\e[B": history-search-forward

# Needed because binding 'p' in command mode above wipes its insert mode
# function, too. This fixes that, and will insert 'p' when you type 'p'.
"p": self-insert
~/.inputrcを修正する
ほとんど、Use vi shortcuts in terminalの設定をコピーしていますが…
for vi modeの部分は、あとで説明します。
# Use Vi, not Emacs, style editing
set editing-mode vi

# Show all completions as soon as I press tab, even if there's more than one
set show-all-if-ambiguous on
# Ignore case
set completion-ignore-case on
# on menu-complete, first display the common prefix, then cycle through the
# options when hitting TAB
set menu-complete-display-prefix on

###########################################################
# Keymaps for when we're in command mode (e.g., after hitting ESC)
set keymap vi-command

###########################################################
# Keymaps for when we're in insert (i.e., typing stuff in) mode
set keymap vi-insert

# Pressing tab will list all completions & select the first one. Pressing it
# again will cycle through available completions.
TAB: menu-complete
# Shift-TAB cycles completions backward
"\e[Z": menu-complete-backward

# for vi mode
set show-mode-in-prompt on
set vi-ins-mode-string \1\e[34;1m\2(ins) \1\e[0m\2
set vi-cmd-mode-string \1\e[31;1m\2(cmd) \1\e[0m\2
せっかくなので ~/.bashrcのPS1も載せとく
色も設定したかったので、以下のように設定してみます。
バッドプラクティスだったら、優しい方は指摘してもらえるとありがたいですm()m
#--------------------------------------------------
# ps1
#--------------------------------------------------

function prompt {
  local GITPS='$(__git_ps1 " [%s]")'
  local BLUE="\[\e[1;34m\]"
  local RED="\[\e[1;31m\]"
  local GREEN="\[\e[2;32m\]"
  local WHITE="\[\e[00m\]"
  local GRAY="\[\e[1;37m\]"
  PS1="$BLUE\w$BLUE$RED$GITPS$RED $WHITE\$$WHITE "
}
prompt
現在のモードがわからない問題
.inputrcを設定してターミナルを起動すれば、Viモードになっているはずです。
この状態でしばらく使っていたのですが、ターミナルに現在のモードが表示されていないことに気づきました。insとcmdのどちらなのか分からない問題が発生したためです。
そこで、ターミナルに現在のモードを表示する方法を引き続き検索してみます。
ターミナルに現在のモードを表示する
以下の記事にたどり着きました。
いくつか見てみましたが、GitHubのREADME.mdを見るのが分かりやすそうです。
GitHubを見ると、Bashのバージョンは4.3.48以上が必要みたいです。
現在使っているBashのバージョンを確認して、必要ならbrewでインストールし、ログインシェルを変更します。
Bashのバージョンの確認
まずは確認します。
~ $ /bin/bash -version
GNU bash, version 3.2.57(1)-release (x86_64-apple-darwin17)
Copyright (C) 2007 Free Software Foundation, Inc.
brewでBashをインストールする
いつも通り、インストールします。
~ $ brew install bash
Updating Homebrew...
==> Auto-updated Homebrew!
Updated 3 taps (homebrew/cask-versions, homebrew/core and homebrew/cask).
==> Updated Formulae
asciidoctor ✔                 ccextractor                   ethereum                      grib-api                      openvdb                       source-to-image
harfbuzz ✔                    chruby-fish                   fluent-bit                    hebcal                        pacapt                        typescript
weechat ✔                     cpprestsdk                    fonttools                     ioping                        pdftoipe                      you-get
activemq                      dartsim                       git-archive-all               libjson-rpc-cpp               ppsspp
ark                           dfmt                          glm                           liblo                         rdesktop
bash-snippets                 django-completion             grails                        mongo-cxx-driver              selenium-server-standalone

==> Downloading https://homebrew.bintray.com/bottles/bash-4.4.23.high_sierra.bottle.tar.gz
######################################################################## 100.0%
==> Pouring bash-4.4.23.high_sierra.bottle.tar.gz
==> Caveats
In order to use this build of bash as your login shell,
it must be added to /etc/shells.
==> Summary
🍺  /usr/local/Cellar/bash/4.4.23: 146 files, 8.8MB
brewの出力にも書かれている通り、/etc/shellsに追加しておきます。
In order to use this build of bash as your login shell,
it must be added to /etc/shells.
/etc/shellsに追加する
現在のファイルを確認します。
~ $ sudo cat /etc/shells
# List of acceptable shells for chpass(1).
# Ftpd will not allow users to connect who are not using
# one of these shells.

/bin/bash
/bin/csh
/bin/ksh
/bin/sh
/bin/tcsh
/bin/zsh
brewでインストールしたBashを追加します。
~ $ sudo vim /etc/shells
修正後に、改めて確認します。
~ $ sudo cat /etc/shells
# List of acceptable shells for chpass(1).
# Ftpd will not allow users to connect who are not using
# one of these shells.

/bin/bash
/bin/csh
/bin/ksh
/bin/sh
/bin/tcsh
/bin/zsh
/usr/local/bin/bash
ログインシェルを変更する
変更する前に確認します。
~ $ which bash
/bin/bash
変更するためのコマンドを確認します。
~ $ man chsh
一部を抜粋しておきます。
CHPASS(1)                 BSD General Commands Manual                CHPASS(1)

NAME
     chpass, chfn, chsh -- add or change user database information

SYNOPSIS
     chpass [-l location] [-u authname] [-s newshell] [user]

DESCRIPTION
     The chpass utility allows editing of the user database information associated with user or, by default, the current user.

     The chpass utility cannot change the user's password on Open Directory systems.  Use the passwd(1) utility instead.

     The chfn, and chsh utilities behave identically to chpass.  (There is only one program.)

     The information is formatted and supplied to an editor for changes.

     Only the information that the user is allowed to change is displayed.

     The options are as follows:

     -l location
             If not specified, chpass will perform a search for the user record on all available Open Directory nodes.  When specified, chpass will edit the user record on the directory node at the given location.

     -u authname
             The user name to use when authenticating to the directory node containing the user.

     -s newshell
             Attempt to change the user's shell to newshell.

     Possible display items are as follows:

           Login:              user's login name
           Uid:                user's login
           Gid:                user's login group
           Generated uid:      user's UUID
           Full Name:          user's real name
           Office Location:    user's office location
           Office Phone:       user's office phone
           Home Phone:         user's home phone
           Home Directory:     user's home directory
           Shell:              user's login shell
以下のコマンドを実行してみます。
~ $ chsh -s /usr/local/bin/bash
Changing shell for yourName.
Password for yourName:
確認(reboot必要かも…)
~ $ which bash
/usr/local/bin/bash
改めてバージョンを確認する
確認します。
~ $ bash --version
GNU bash, version 4.4.23(1)-release (x86_64-apple-darwin17.5.0)
Copyright (C) 2016 Free Software Foundation, Inc.
License GPLv3+: GNU GPL version 3 or later <http://gnu.org/licenses/gpl.html>

This is free software; you are free to change and redistribute it.
There is NO WARRANTY, to the extent permitted by law.
現在のモードが表示されるはず
これで現在のモードが表示されるはずです。
モードの表示を修正する
~/.inputrcを修正すれば大丈夫です。
このブログを見ている人には説明不要だと思うので、説明は省略します。各自で調整してください。
# for vi mode
set show-mode-in-prompt on
set vi-ins-mode-string \1\e[34;1m\2(ins) \1\e[0m\2
set vi-cmd-mode-string \1\e[31;1m\2(cmd) \1\e[0m\2
あとがき
いつも使うターミナルをViのキーバインドで操作できるようになって、本当に快適になりました。